

Quick Start: Deploy and Share a Build
Overview:
Follow the 4 steps in this guide to quickly deploy a build through Solsta and share with your teams.
Step 1: Choose a deployment option:
Step 2: Deploy your first build
Install or check for the system requirements on the machine running the deploy job:
- .NET 8.0
- Linux: GLIBC ≥ 2.35 (comes with Ubuntu 22+)
Deploy via Plugins:
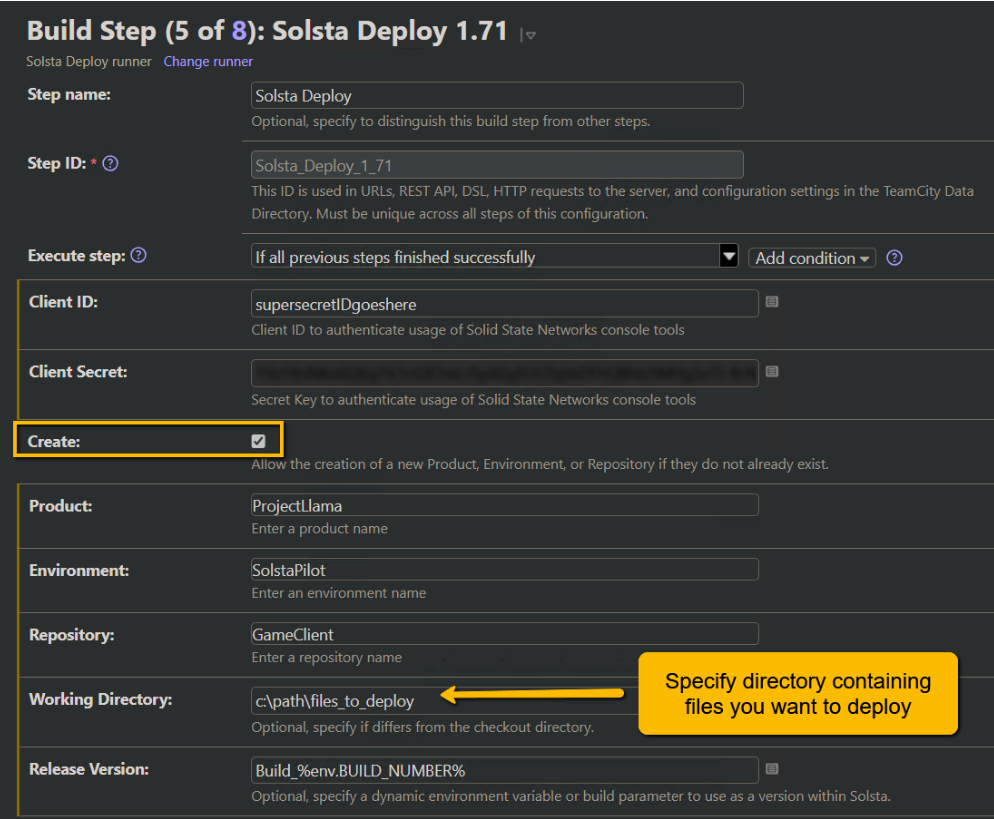
After you have installed the plugin, add the Solsta Deploy build step to a project and configure it:
- Paste the client ID and client secret you received via email
- Check the “Create” box to auto-create objects during deployment
- Specify the path to files you want to deploy in the “working directory” field
- Save & run it
Deploy via Executables
Create a JSON file on your machine (solsta_auth.json) with the following contents, replacing the client ID and secret values that you received via email.
{
    "consoleCredentials": {
        "clientId": "yourClientId",
        "clientSecret": "yourClientSecret",
        "grant": "clientCredentials"
    }
}
Download Console Tools
The Solsta console tools are used for scanning source files and uploading data during deployments. Use direct_get from a terminal with the arguments below to download the console tools:
direct_get.exe --version=7.2.49 \
--target_directory=C:/solsta/deploy/7.2.49/ --component=console \
--console_credentials=c:/solsta/deploy/solsta_auth.json
Note where you downloaded the console tools as you’ll use them in your deployment step.
Deploy Arguments with Autocreate
The release_deploy executable will deploy the files you specify in the source argument to your Solsta storage bucket. The autocreate argument will automatically create the Product, Environment and Repository you specify in the argument string.
Make sure the paths specified are valid, then run to deploy!
release_deploy --console_credentials=c:/solsta/deploy/solsta_auth.json \
--console_directory=C:/solsta/deploy/7.2.49/console/ --autocreate  \
--product_name=ProjectLlama --env_name=SolstaPilot --repository_name=GameClient \
--source=c:/path/files_to_deploy/ --version=1.0
Step 3: Accept Invite & Install the Solsta Application
Check your email to accept the invite to your new Solsta organization and set your password.
Next, install the Solsta Desktop Application and log in.

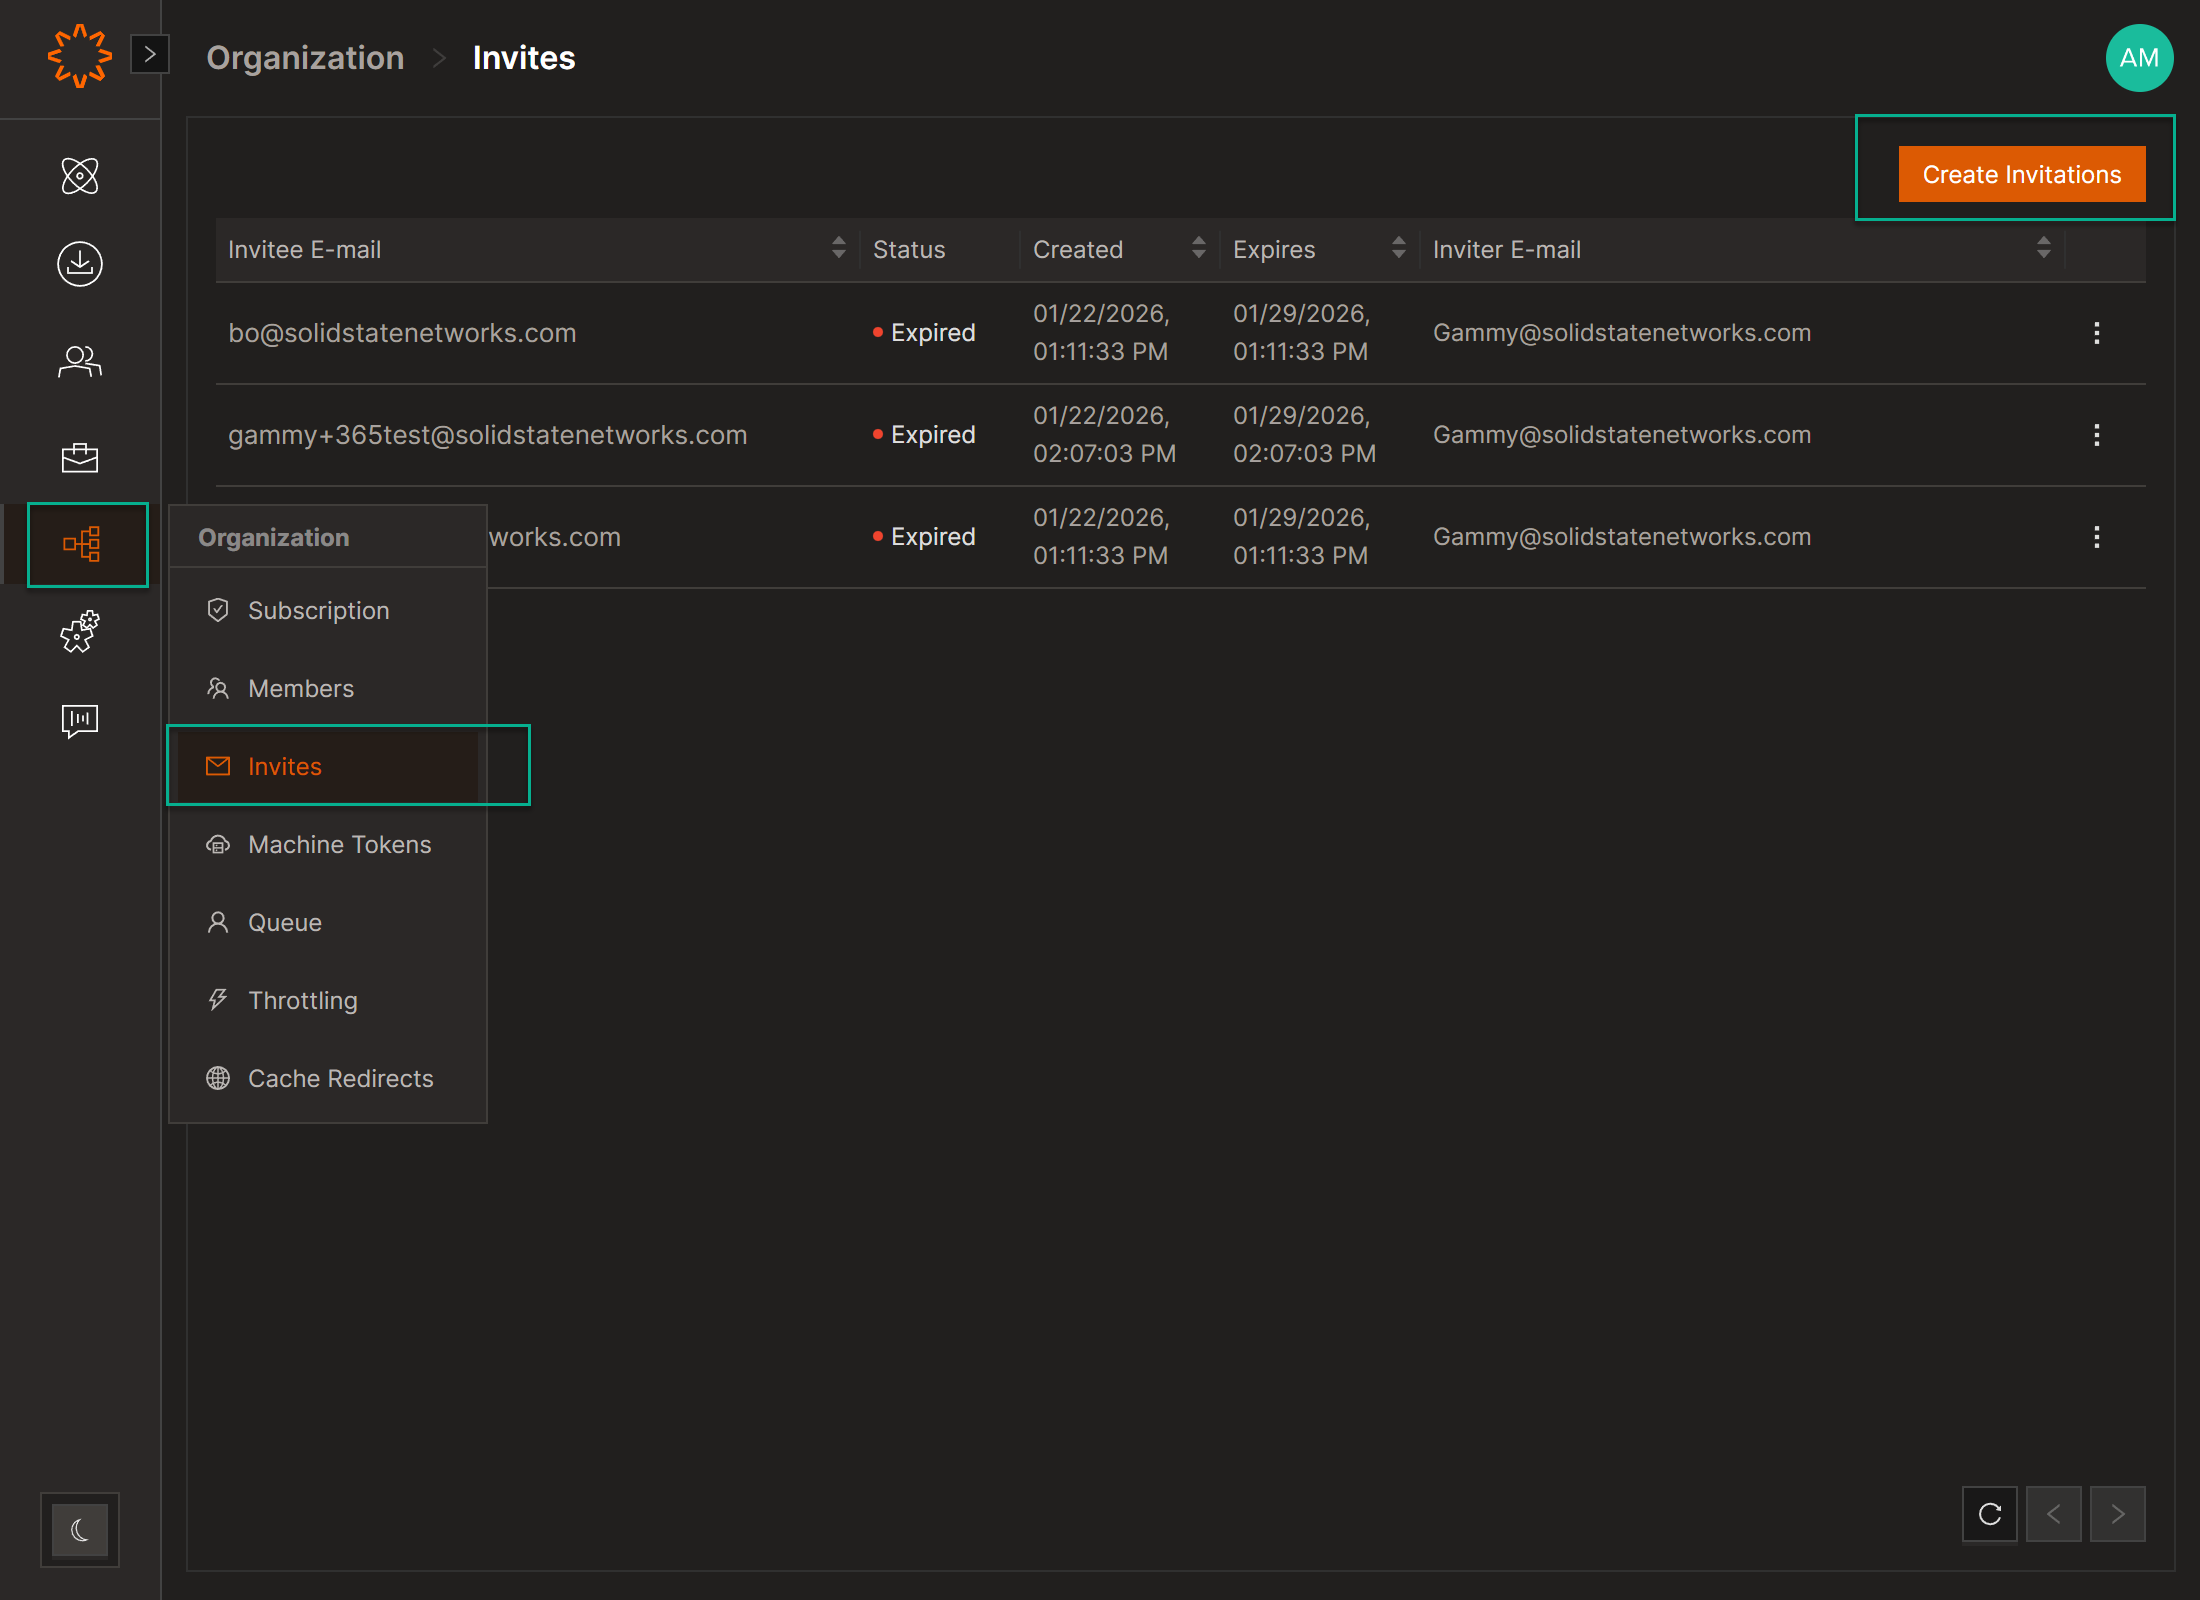
Step 4: Invite your co-workers to Solsta
- Log in to Solsta as an Organization Admin
- Open the Invites tab → click Create Invitation
- Enter one or more email addresses (comma or line-separated)
- Click OK
Add Roles & Permissions
For more granular access, please see Roles & Permissions.

Download and Update
Now your invited co-workers can download the build you deployed by installing the environment you created.
- New deployments trigger update notifications through the app and the operating system
- Automatic daily updates can be applied for each installed environment
- Solsta updates use compression and data deduplication to quickly and efficiently keep your team up-to-date
What's next? Try deploying a second build or configure the environment's launch buttons!