

Environments
Repositories
Promote/Publish
Teams
Launch Buttons
Promotions
Tagging
CLI Guide
2
min
Install & Uninstall
Overview:
Installing the latest environment ensures you have the most up-to-date builds and tooling from Team Assets. In this article we will cover how to install/uninstall envrionments on your machine.
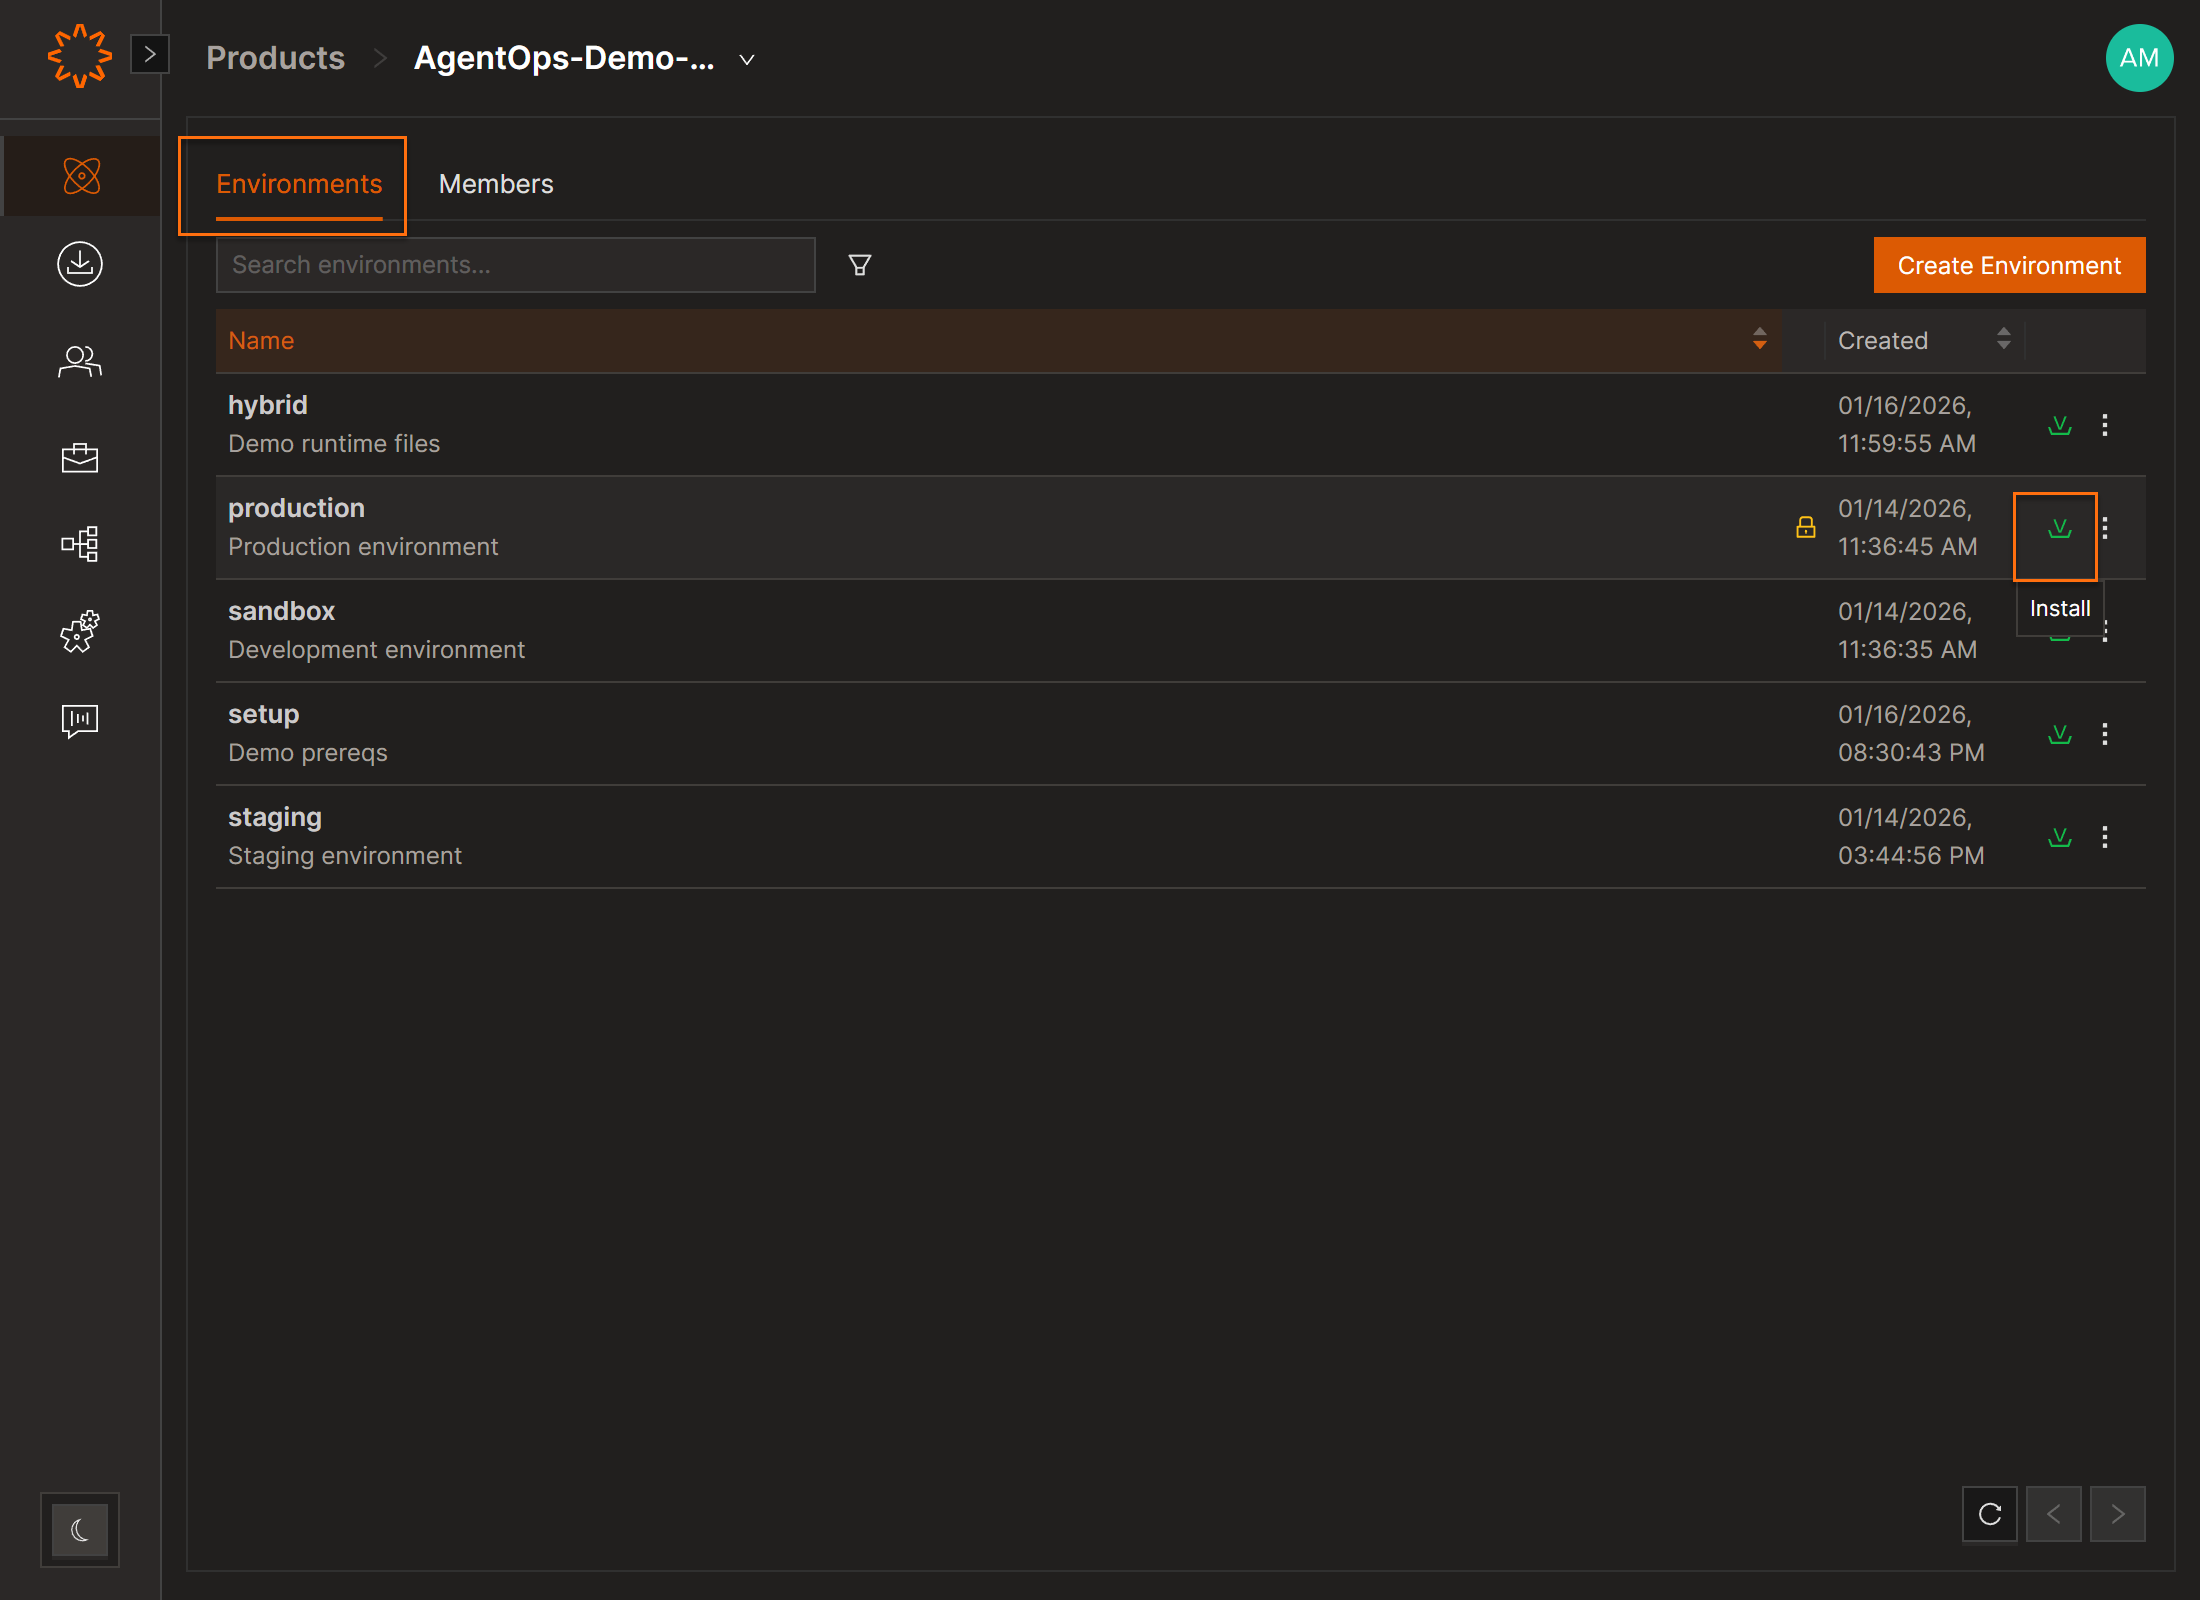
Installing an Environment Steps
- From the Products tab → open Environments.
- Click Install icon on selected Environment
- Once finished, the Environment appears under Installed Environments.
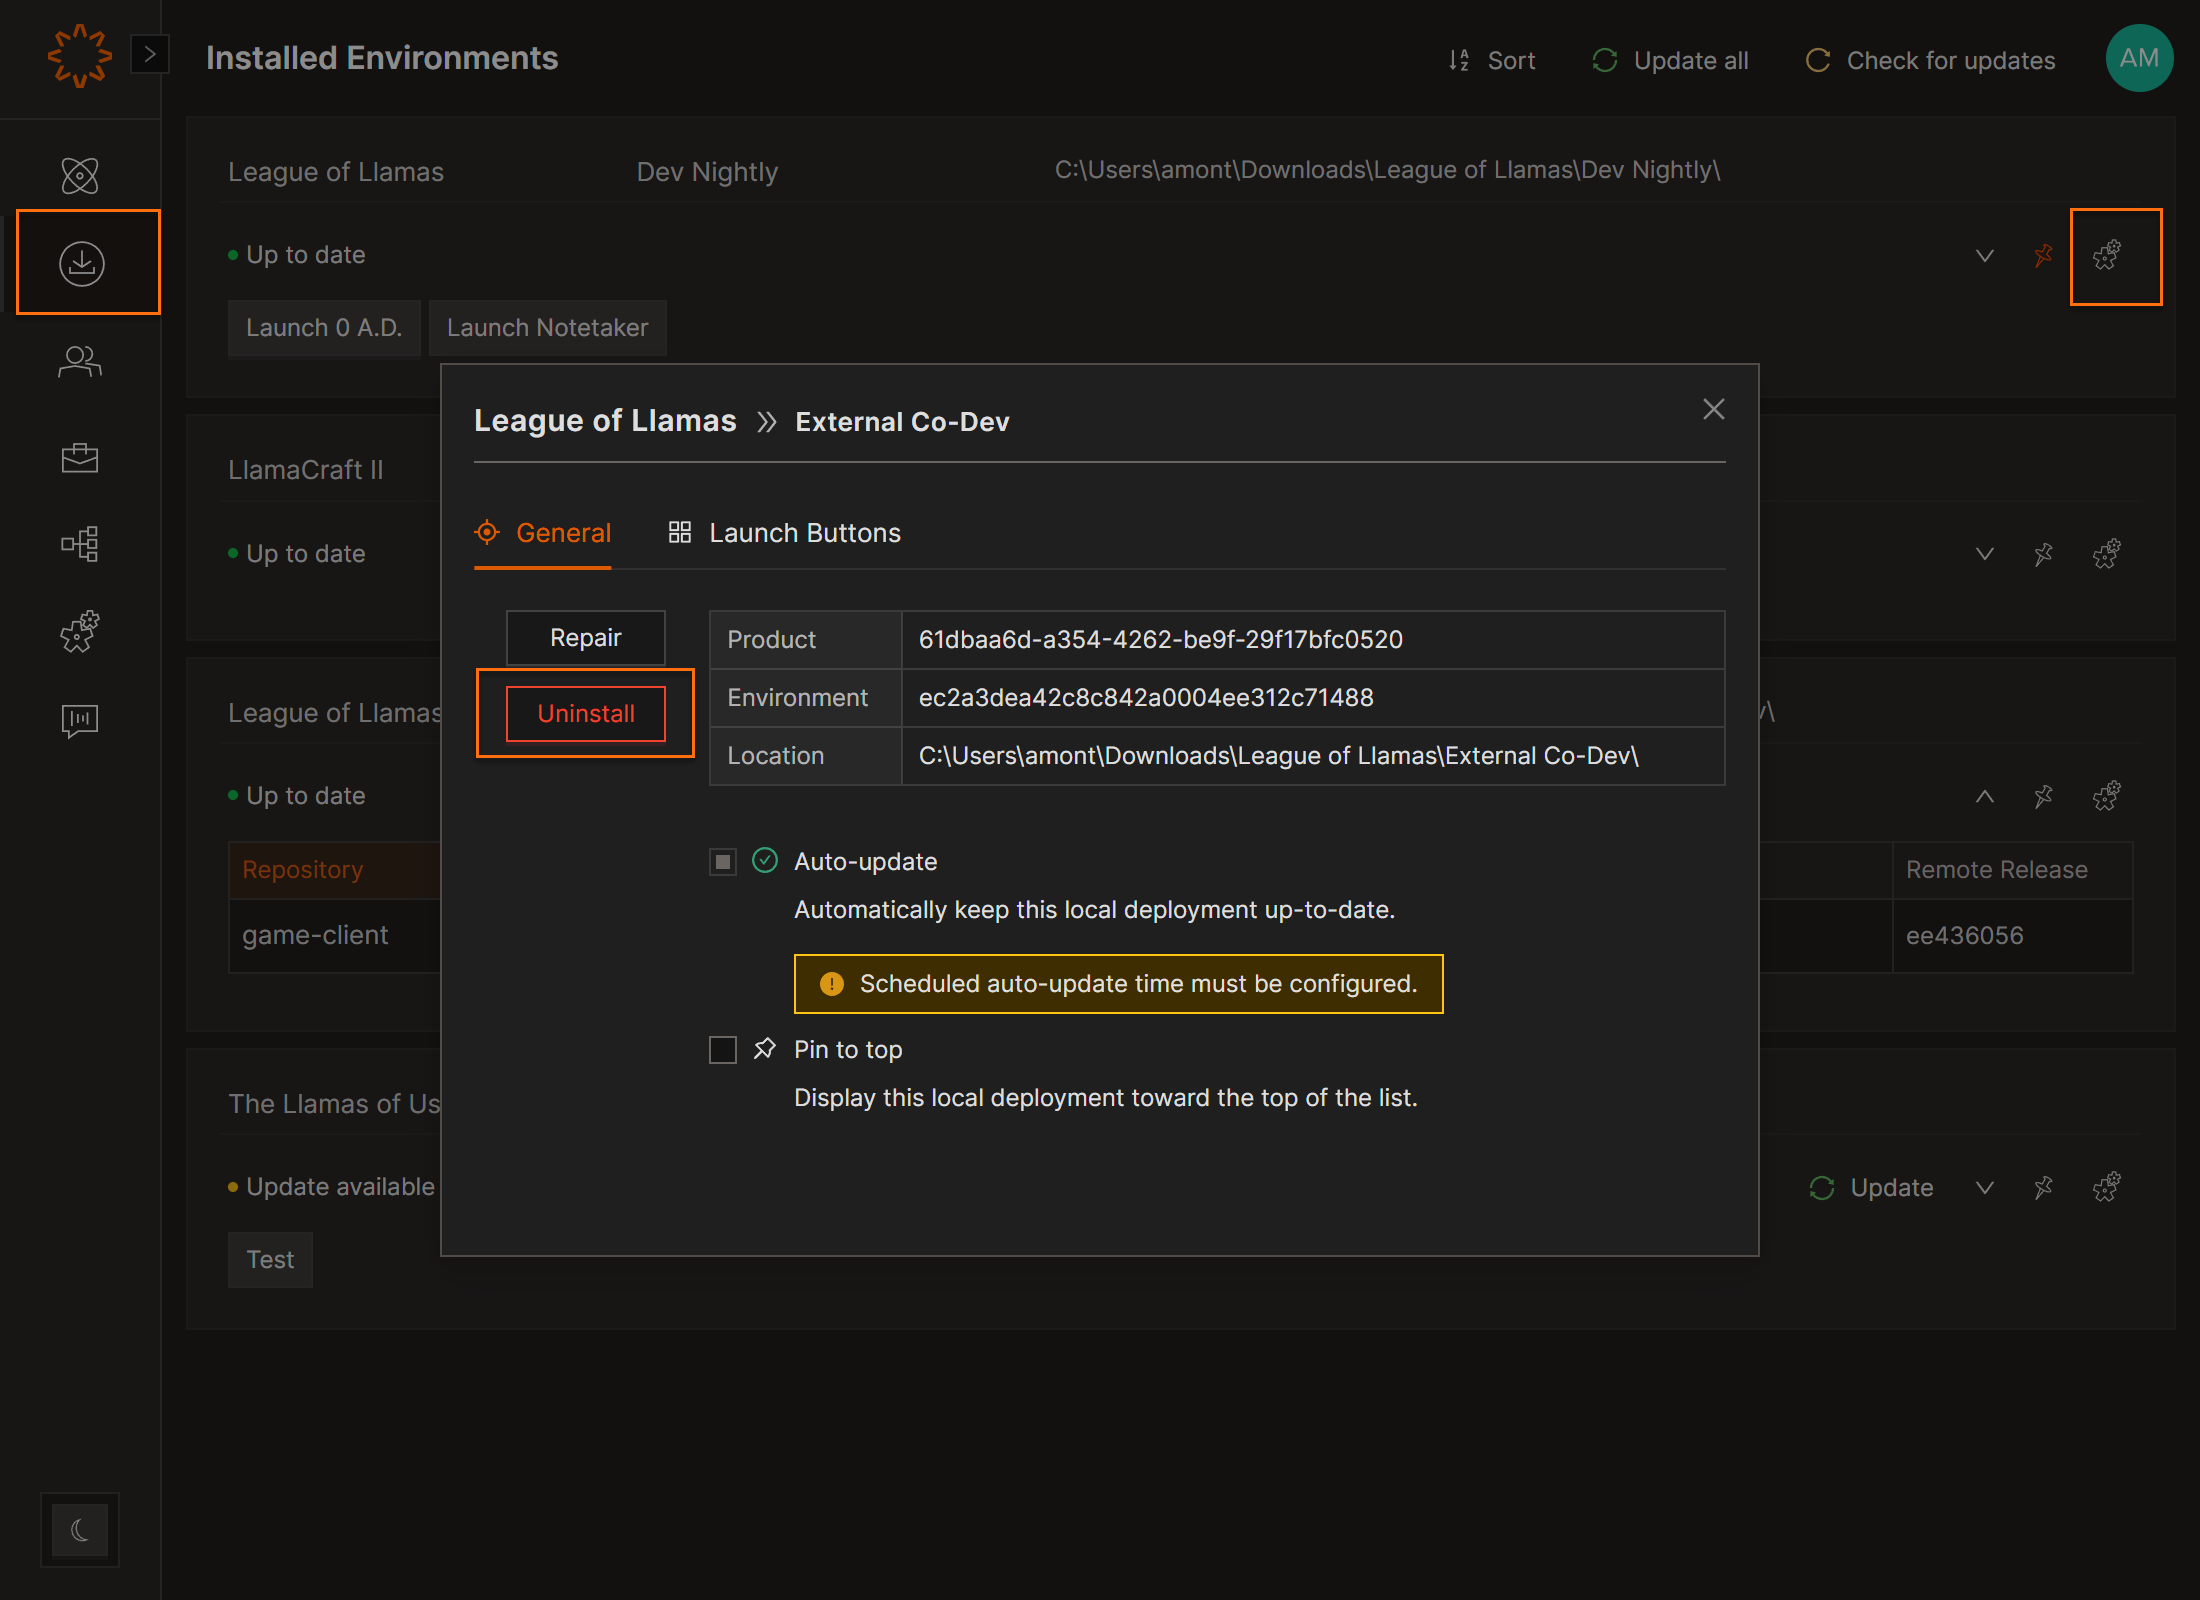
Uninstalling an Environment
- Go to the Installed Environments tab.
- Find the Environment to remove.
- Click the Settings icon.
- Confirm the action (under repair button)
Warning: This only removes the local copy — it doesn’t delete the Environment from Solsta or affect other users.
DOs
DONTs
Pro Tips
You can install the same Environment in multiple locations for different testing or release setups.