

Environments
Repositories
Promote/Publish
Teams
Launch Buttons
Promotions
Tagging
CLI Guide
2
min
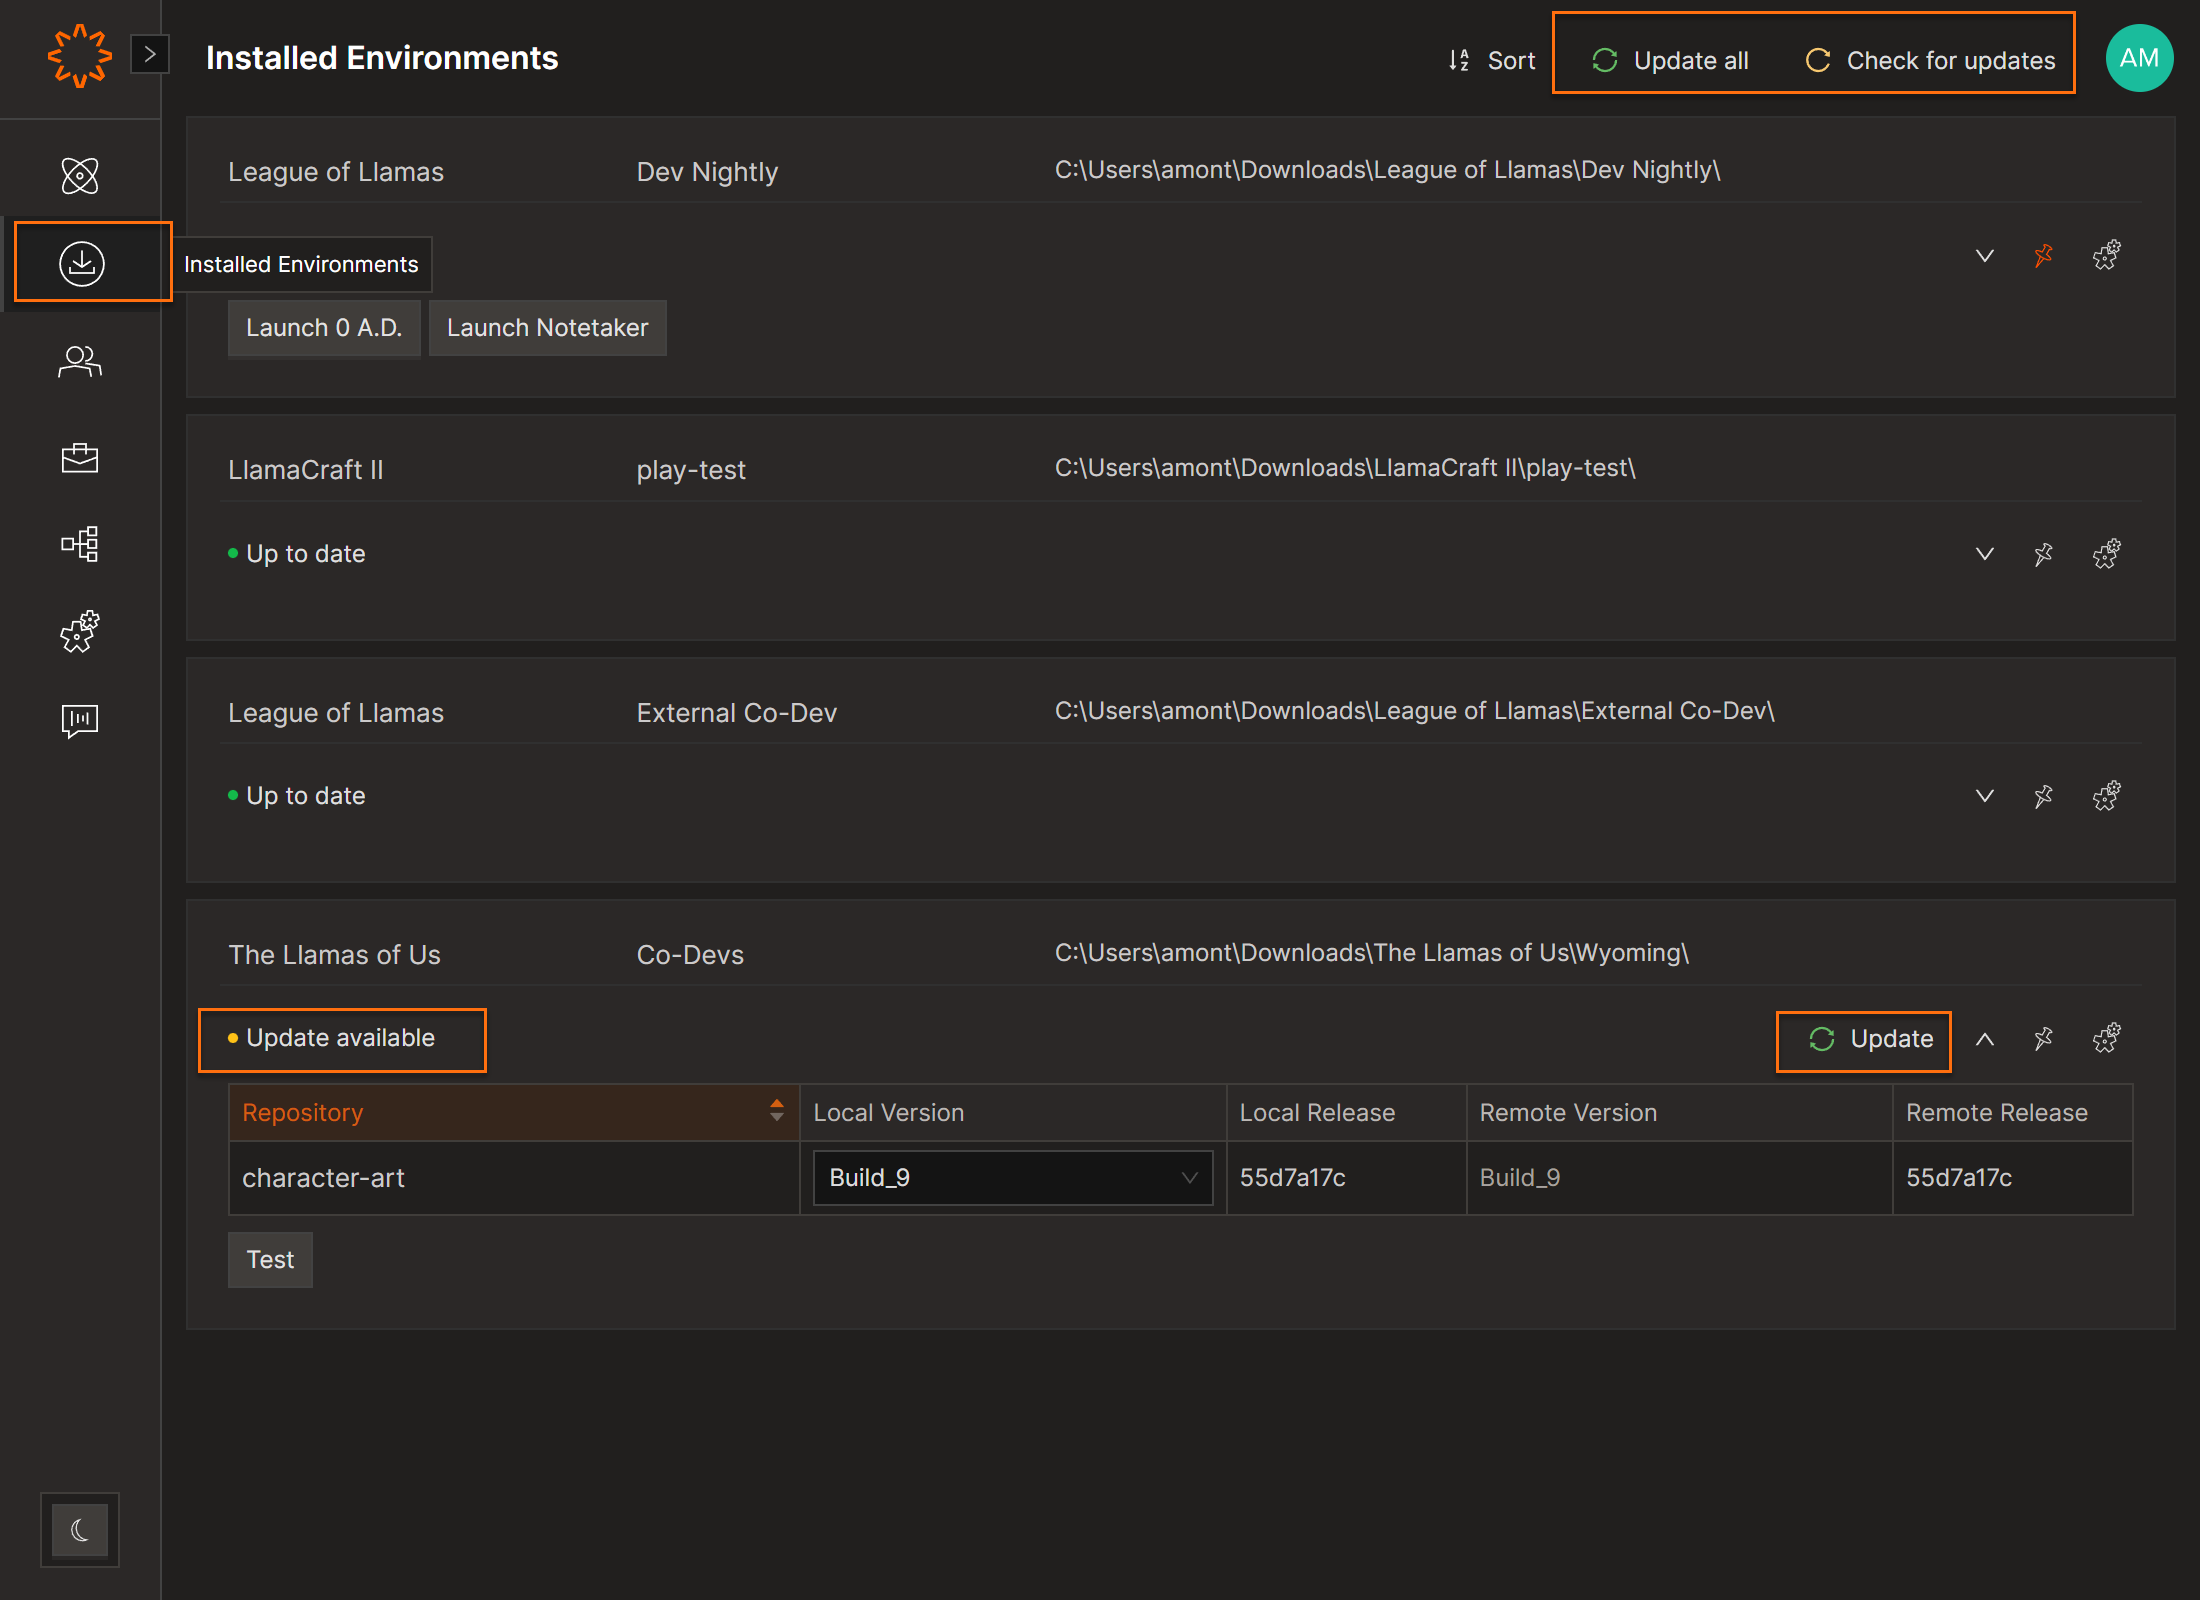
Update Installed Environments
Overview:
Installed Environments are environments you’ve downloaded locally to your machine.
You can wiew and manage installed Environments from the Installed Environments screen.
Update Options
- Click the Update button next to an Environment.
- Select Check for Updates to refresh status.
- Click Update All to install all available updates.
Updates can be triggered manually at any time or scheduled automatically through the settings.
Status Indicators for Environments That Need to Sync with the Latest Version
- 🟢 Green dot – Up to date
- 🟡 Yellow dot – Update available
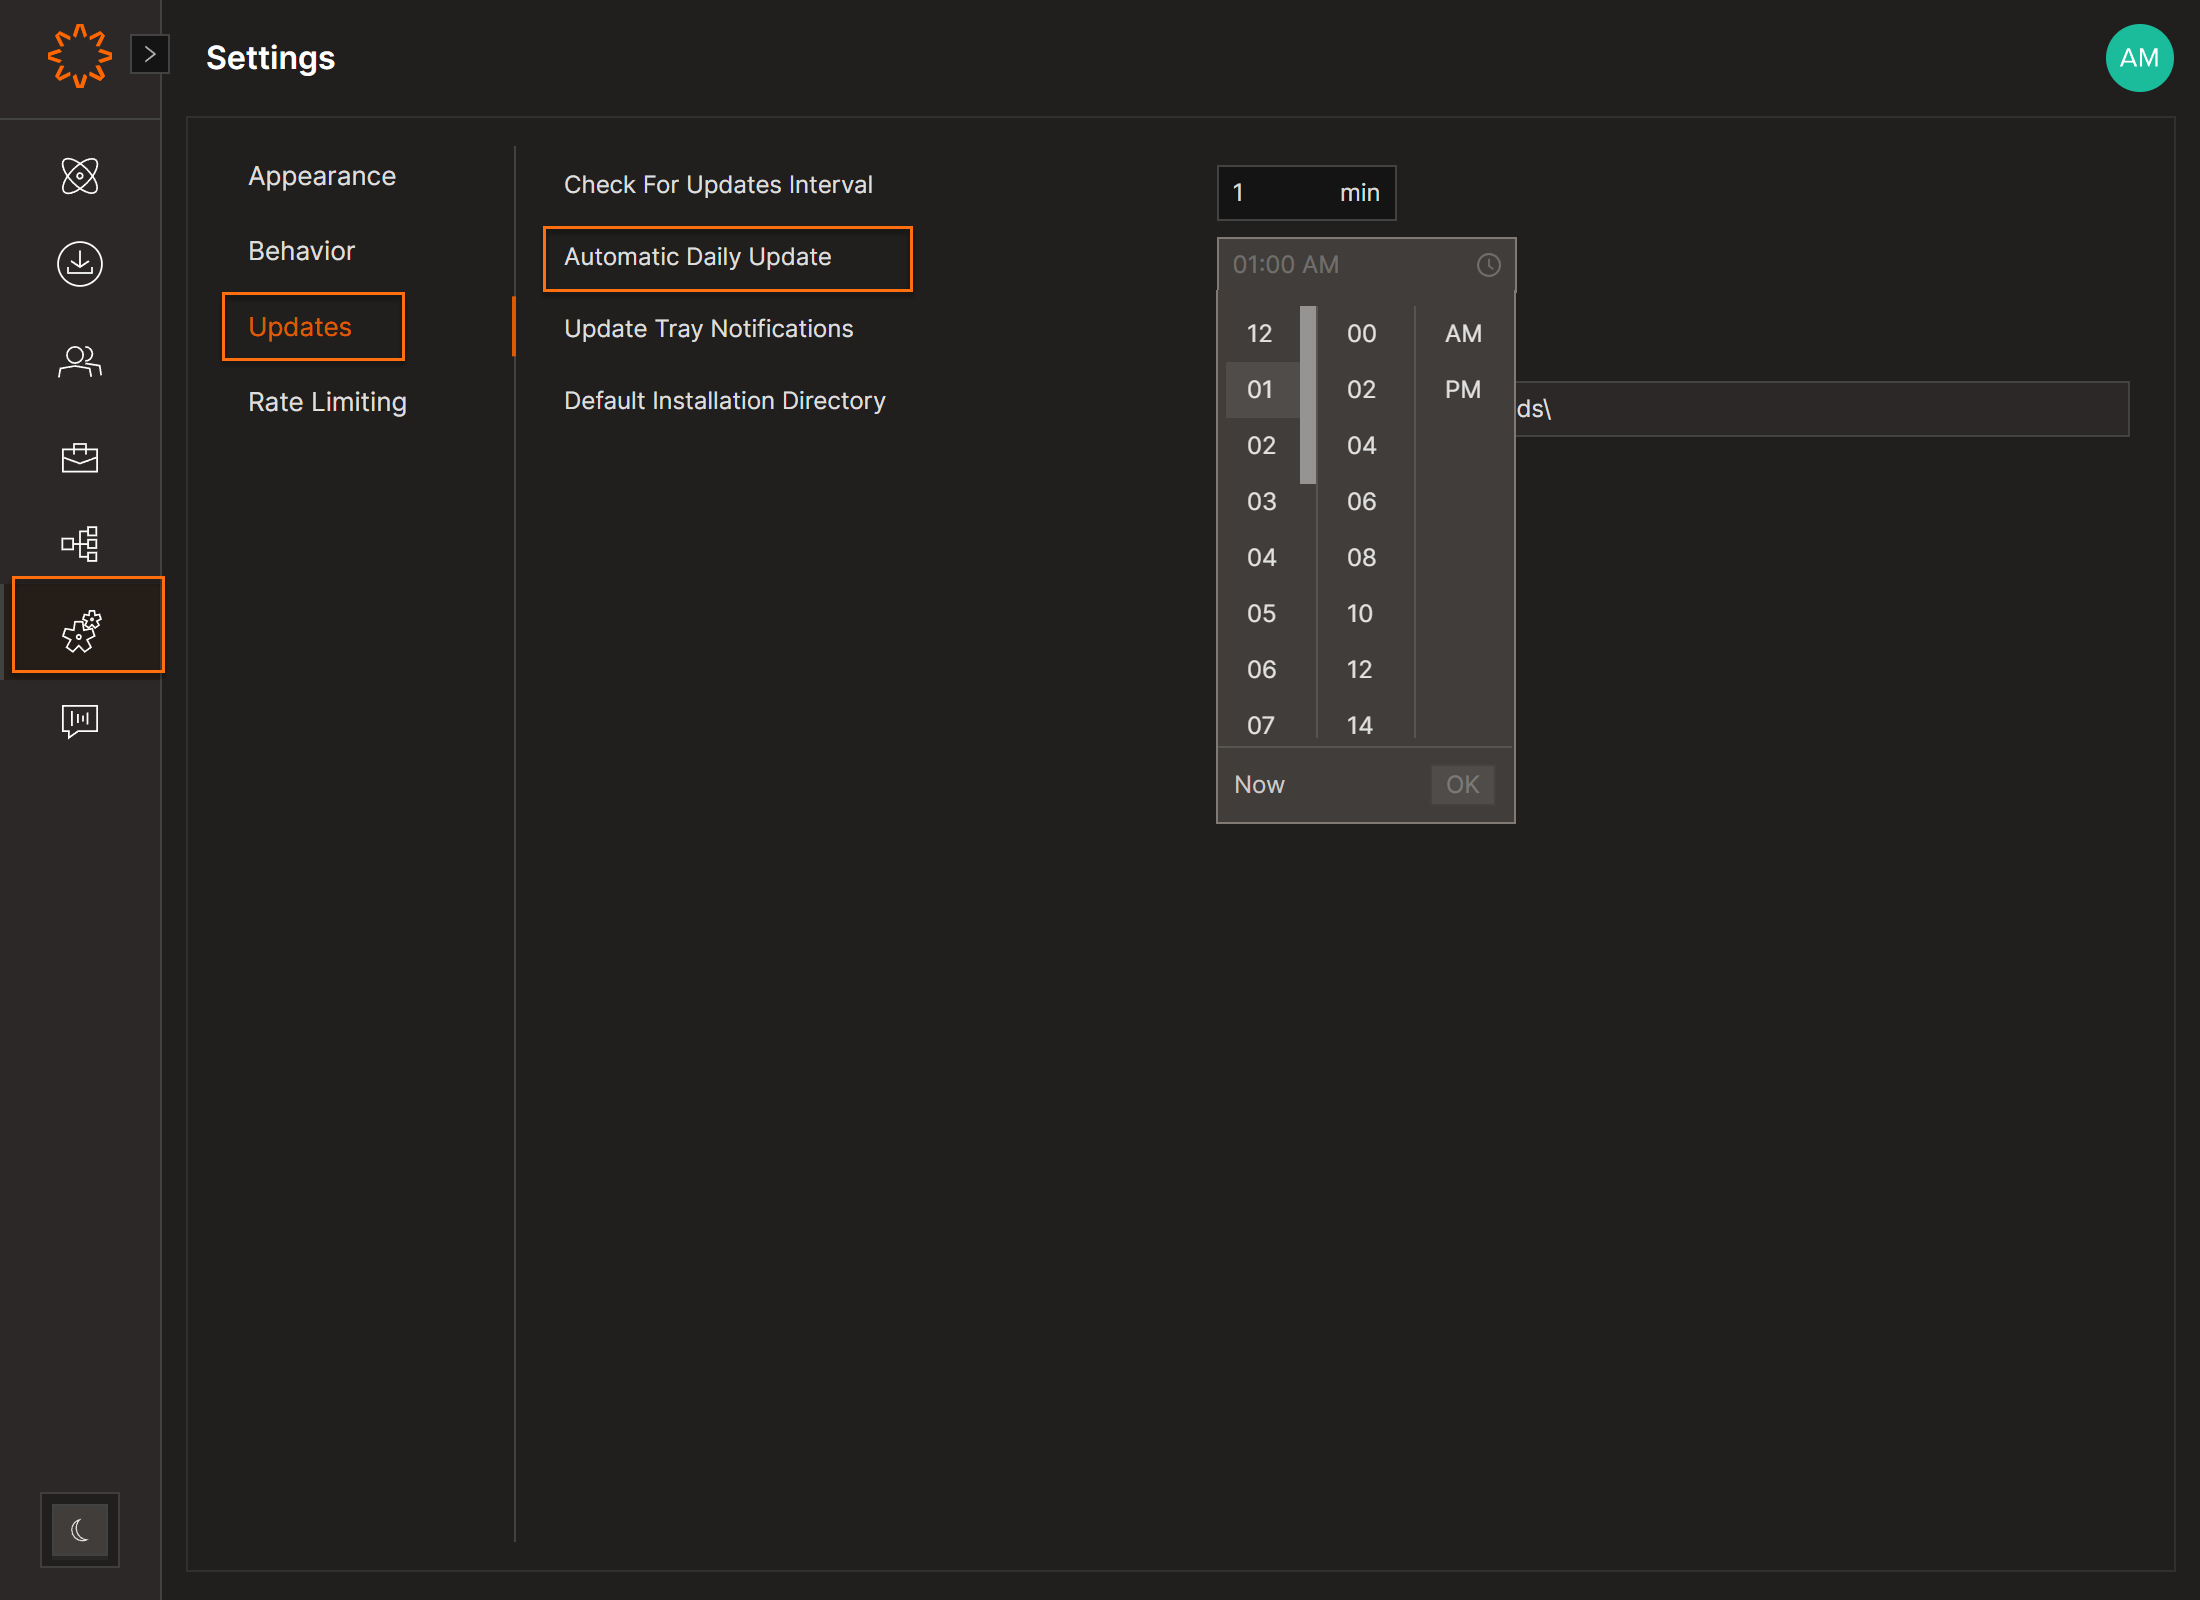
Note: By default, all installed environments are opted into automatic updates.
Tip: You can set different auto-update preferences for each installed environment individually.
DOs
Keep auto-updates on for stable or production environments to ensure you’re always current
DONTs
Pro Tips
For testing or QA builds, consider disabling auto-updates to preserve specific versions. Always verify your local version after major updates or build changes.