

Installing Environments
Overview:
This article explains how to install environments from two locations: the Environments screen and the Repository screen.
Installing Environment Versions:
Users can install a specific environment version—including older versions—directly from the Environments screen.
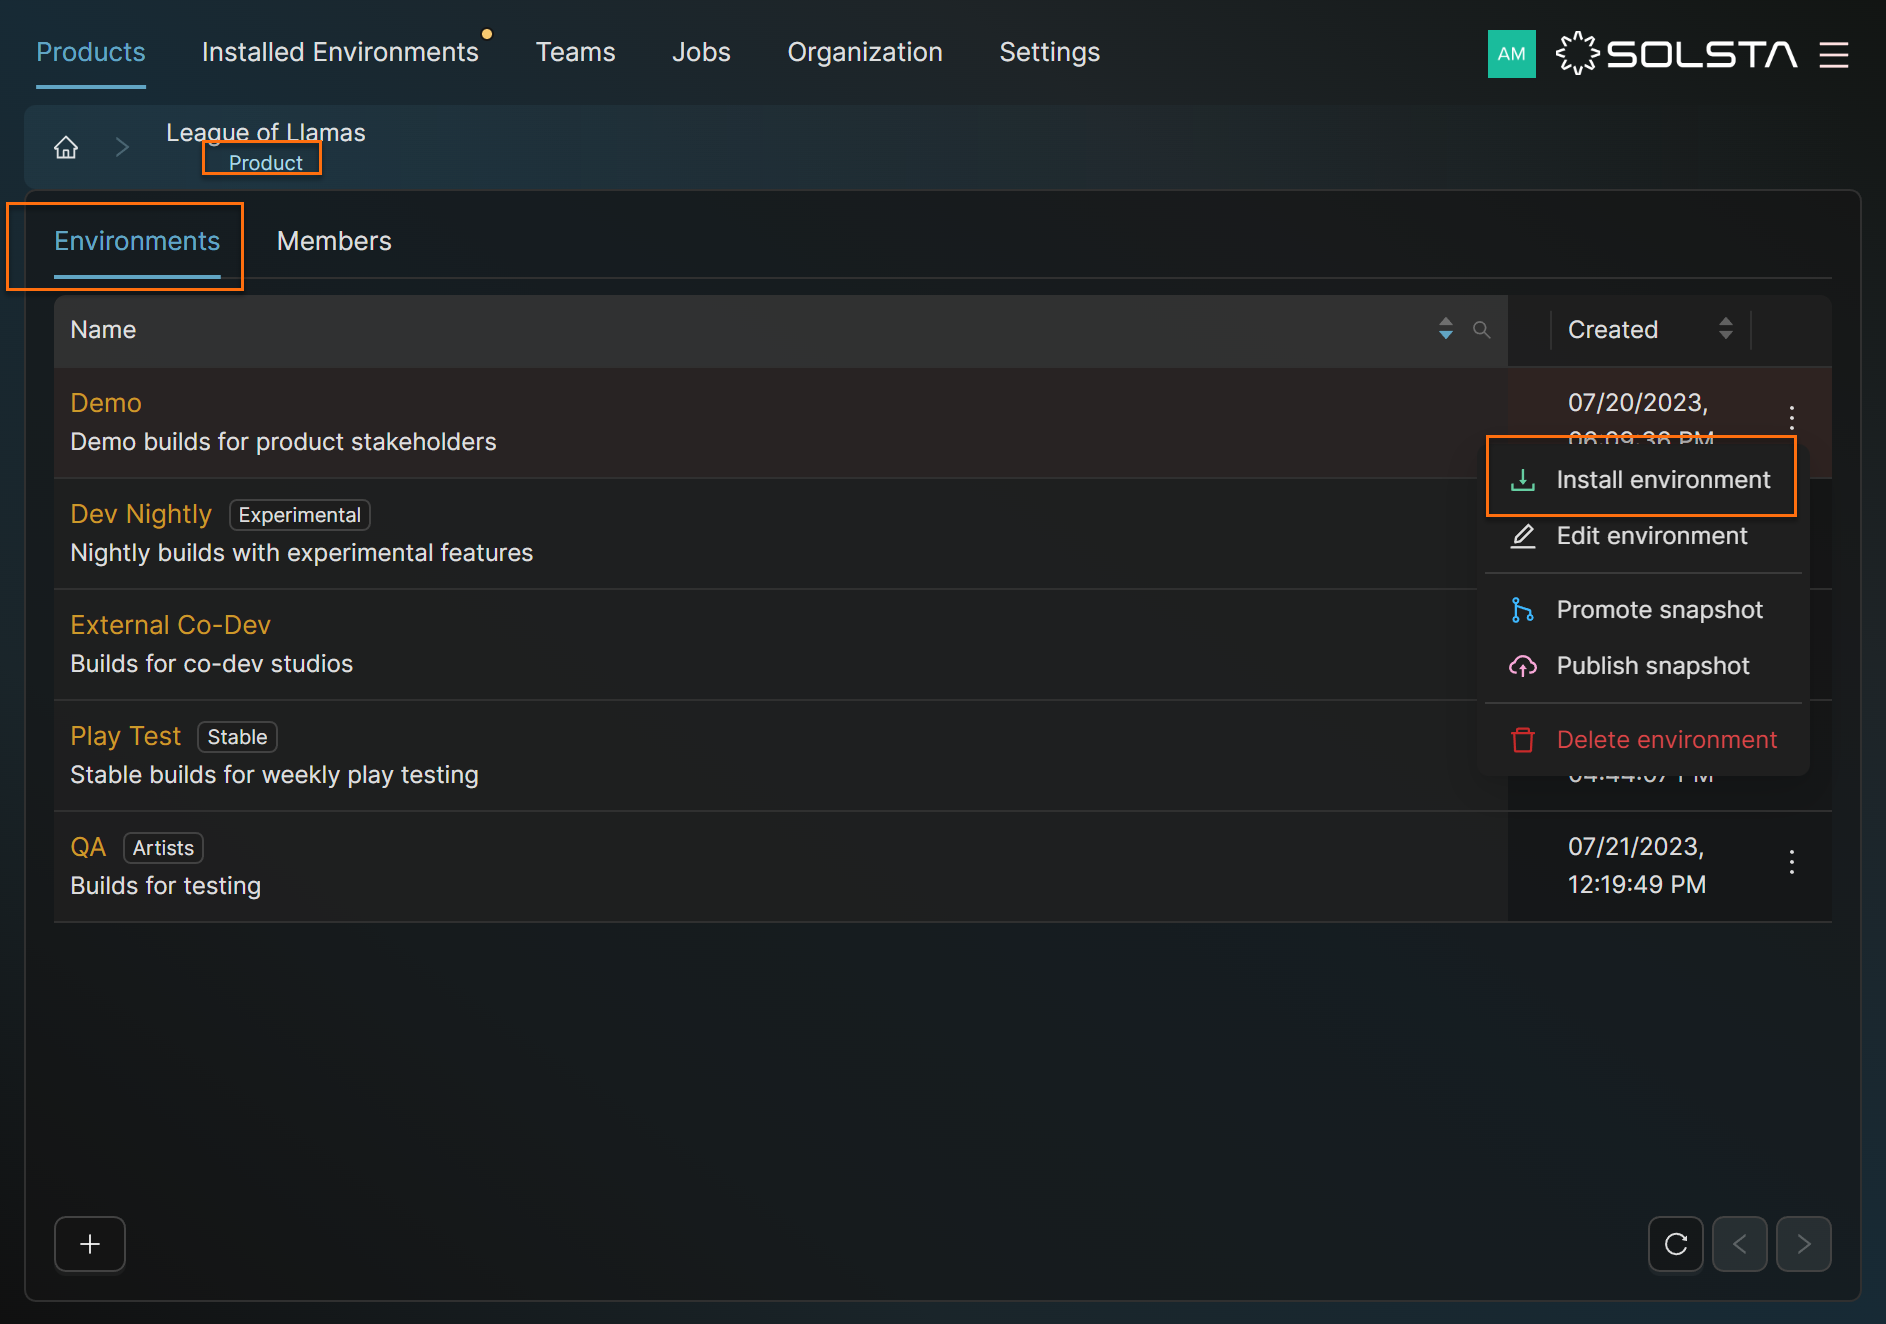
1. From the Environments list:
- Go to your product → Environments.
- Click the ⋯ (three dots) next to an environment → Install Environment.
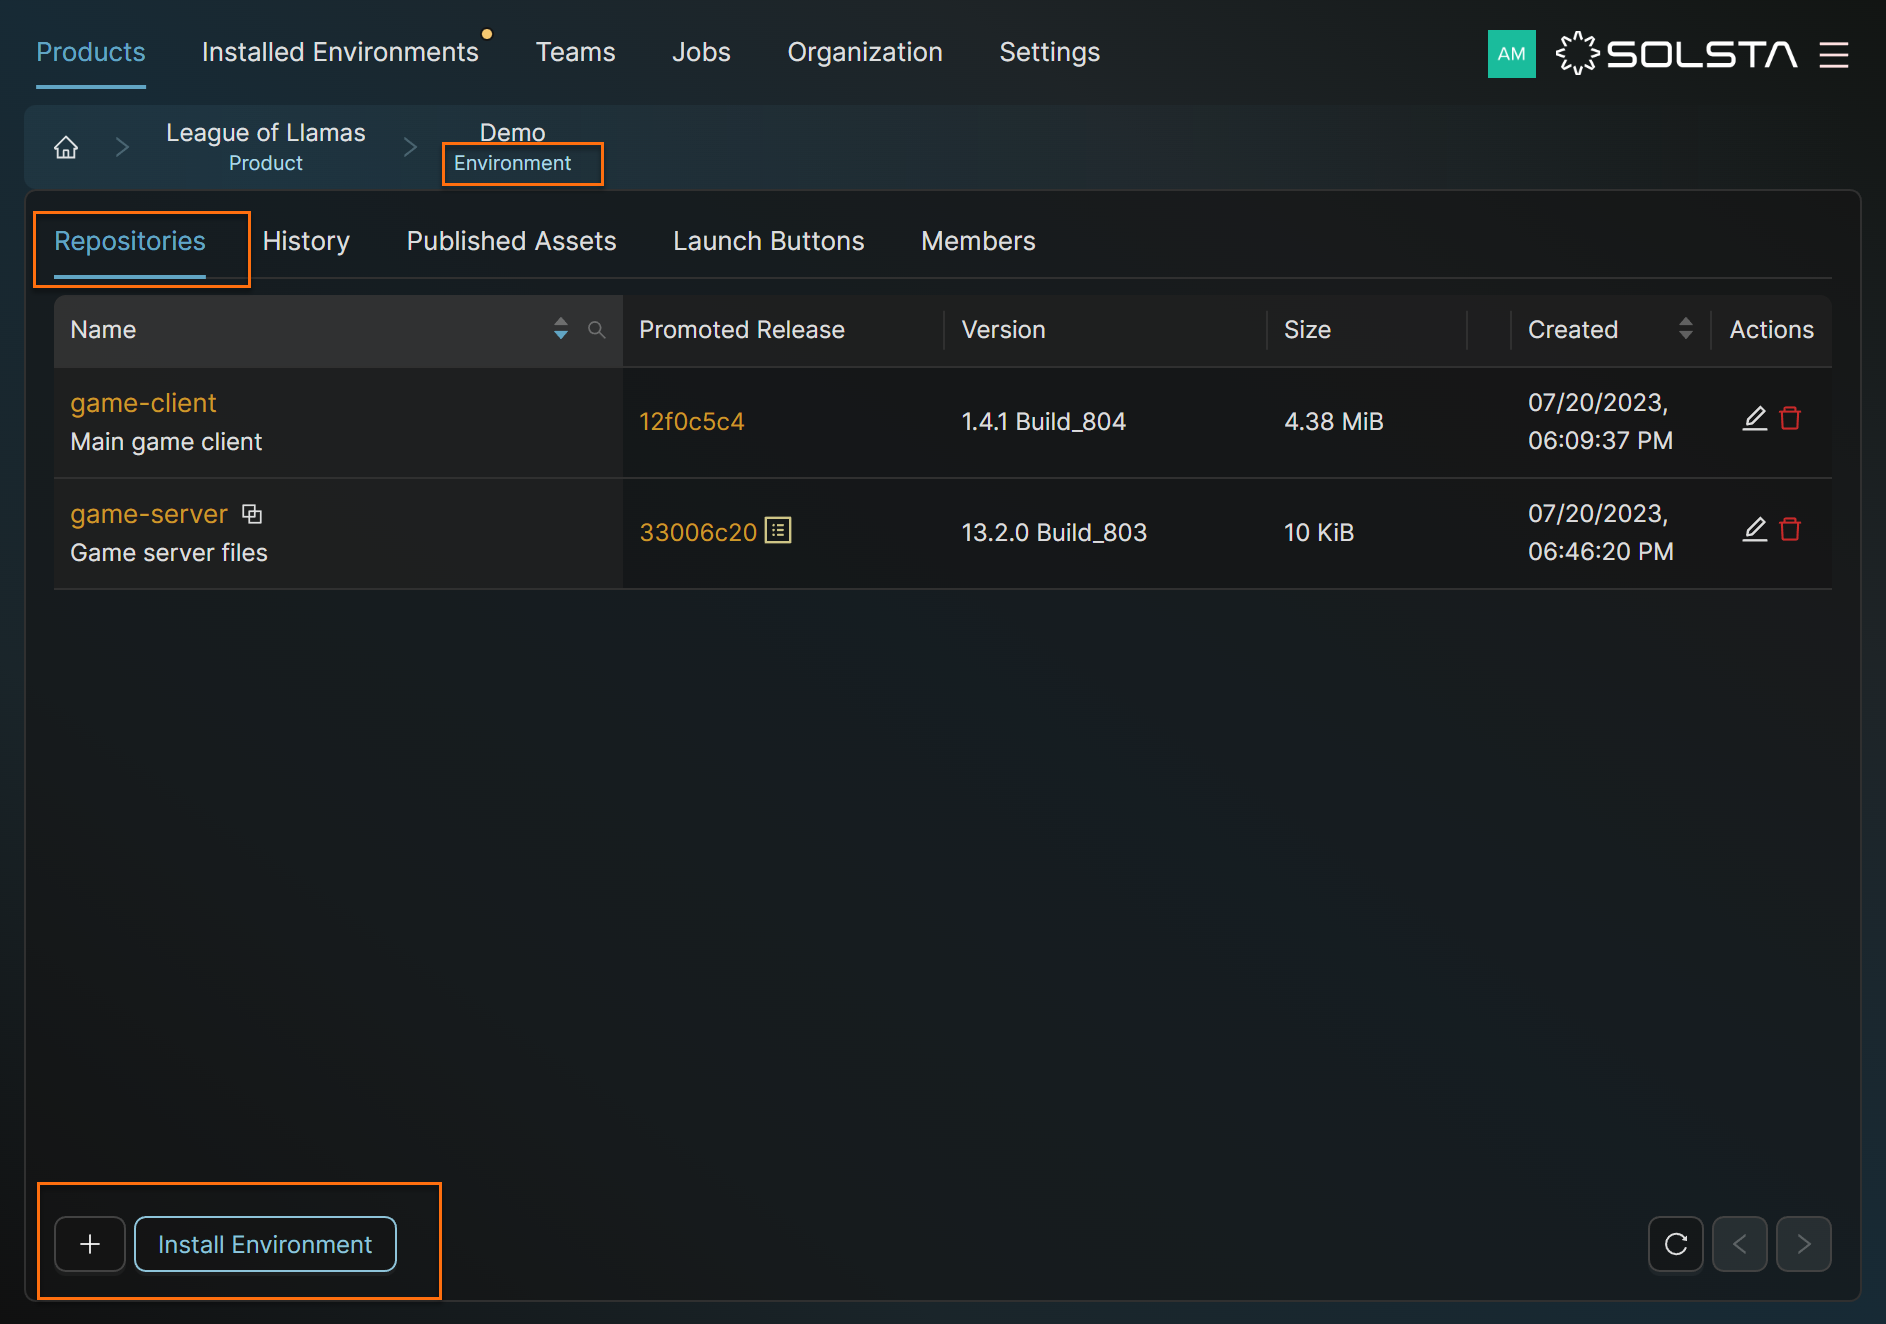
2. From within an environment:
- Click into the environment.
- In the bottom-left corner, select Install Environment.
Then:
- (Optional) Choose repositories to include.
- Pick your installation destination.
- Click Install to finish.
Install from Envrionment List
Install from within Envrionment List
Install Version Snapshot of an Envrionment
The video and instructions below illustrate installing a selected snapshot from an environment. All Solsta users can view these snapshots on environments they have access to.
Installing a Specific (or Older) Version
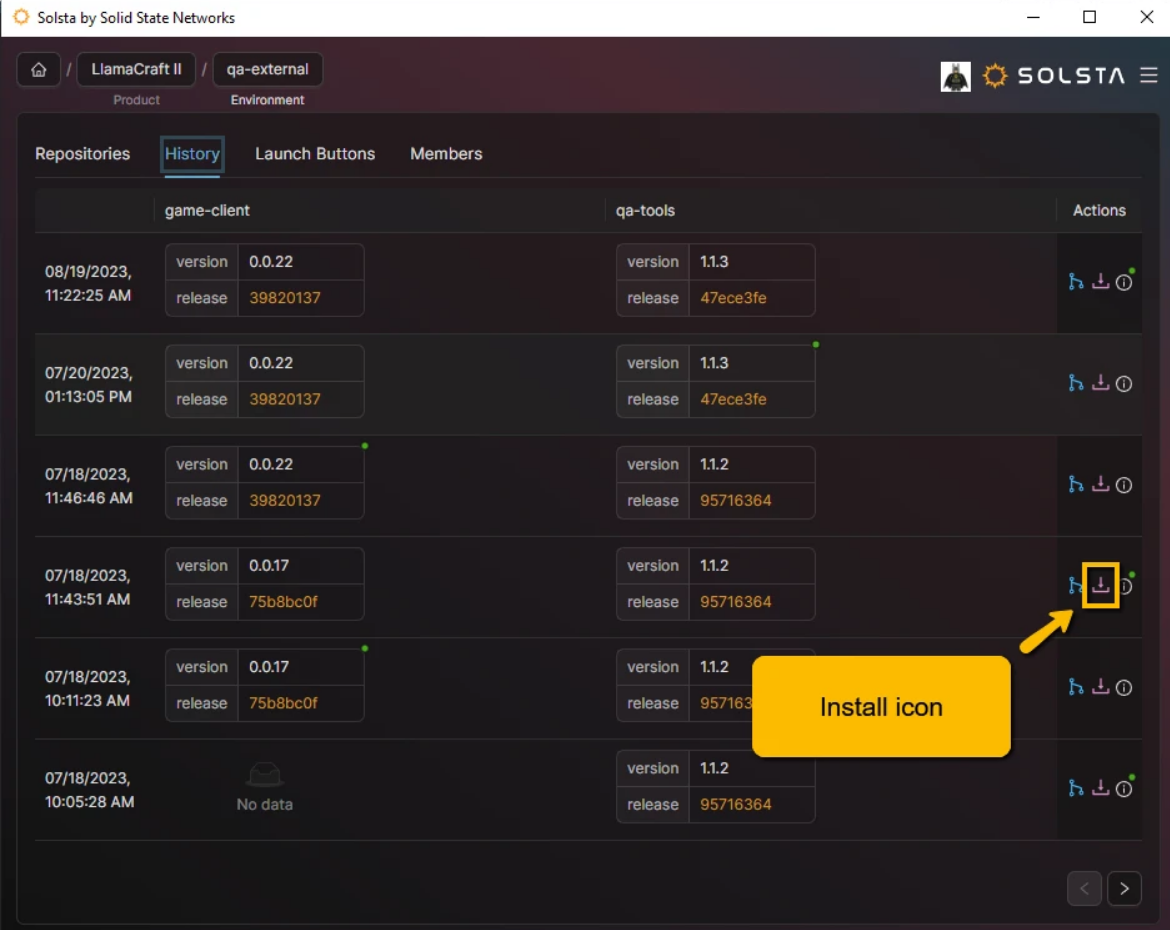
Steps
- Select a Product.
- Select an Environment.
- Open the History tab.
- Find the snapshot that contains the version set you want.
- Click the Install icon in the Actions column.
- In the Create New Local Installation window, confirm the destination directory.
- Click Install.
After Installation
Because you installed a snapshot rather than the currently promoted versions, the environment may show “Update Available.”
You can leave it as-is, update manually when you're ready, or opt out of automatic updates.